
Beat Programming
I’ve produced thousands of drum loops under my label Sounds of Revolution (SOR). It’s just my biggest passion and the main theme of my sample packs. I find it crucial that my samples sound original and don’t sound like they’ve been heard a thousand times. To create my signature sound, I heavily layer sounds to give my creation a unique shape. For this, I use sounds from a lot of different sources. The classics, like (analog) drum machines, are also employed, along with many field recordings. For me, the use of field recordings is the basis for creating my fingerprint.
This is my current list (updated regularly) of the best plugins for Beat Programming besides a few beat programming pointers that I believe are crucial. For detailed specifications please visit the linked websites of the manufacturers.
Less is more – the most important rule
As a beginner, beat programming will quickly lead you to layer / combine different drum loops/loads of drum elements. It is assumed that this is how you create a full, assertive beat. But the opposite is often the case. If you then add more elements (melody/bass/pads etc.), a track is quickly overloaded, as the combination of drum/top loops can quickly lead to frequency overlaps.
Chop your drum loop in peaces. If you use less or only the basic beat elements, the track has more breathing space and feels less crowded. Therefore e.g. switch on/off every single element of a drum loop and decide what sample you really need for your track. Then you can easily re-arrange the position of each hit to create diversification. When you bring just a few hits of the drum loop you also can create tension (maybe with some effects to different drum elements?). You can also create more space into the mix by panning the stereo position of your elements.
Try processing drum loops creatively to build your own signature sound. The goal should always be to focus on the important drum elements. Give every hit its own space. Otherwise, you could end up to with a cluttered jumble of crashing sounds.

A drum loop can be compared to a human conversation. Individual elements should not ‘speak’ at the same time.

XLN Audio Life
When creating sample packs, I often layer foley sounds that I have recorded from various sources. By layering these samples to your loops you can create your own sound/style and stand out from the crowd. I now have a new tool in my range for precisely this purpose – Life! This unique tool seems to be a quick alternative!
With XLN Audio Life, you can create an endless loop of rhythms using the distinctive noises from your most memorable experiences. With Life’s companion mobile Field Recorder and DAW Recorder apps, you can record anything, anywhere, at any time. You may drag and drop any file from anywhere into the VST.
The app provides a real handy means of interacting with the plugin. Since the majority of people use their phones as field recorders, it makes sense to do so and enhances the experience. The app integration is just fantastic, in my opinion! When I’m out and about in the future, I’m sure to take more random recordings.
This tool is very well thought out, you can e.g. fav select sounds from the recording that will then definitely be used. There is also an interesting edit page with e.g. swing, envelopes, pitch, different export functions, etc as well as an impressive randomize function. Life is a wonderful way to expedite work and create happy accidents. And happy accidents in particular are often the basis for an unusual sound design! However, the option to change the envelope and pitch each slice again makes it alluring because it’s these little details of workflow that have the power to unleash creativity.
But what’s really done extremely well here is the fun factor! I have rarely worked with a tool that is as intuitive to use and as much fun as Life. You get unusually good-sounding results very quickly. For me, it’s a game-changer and comes highly recommended!
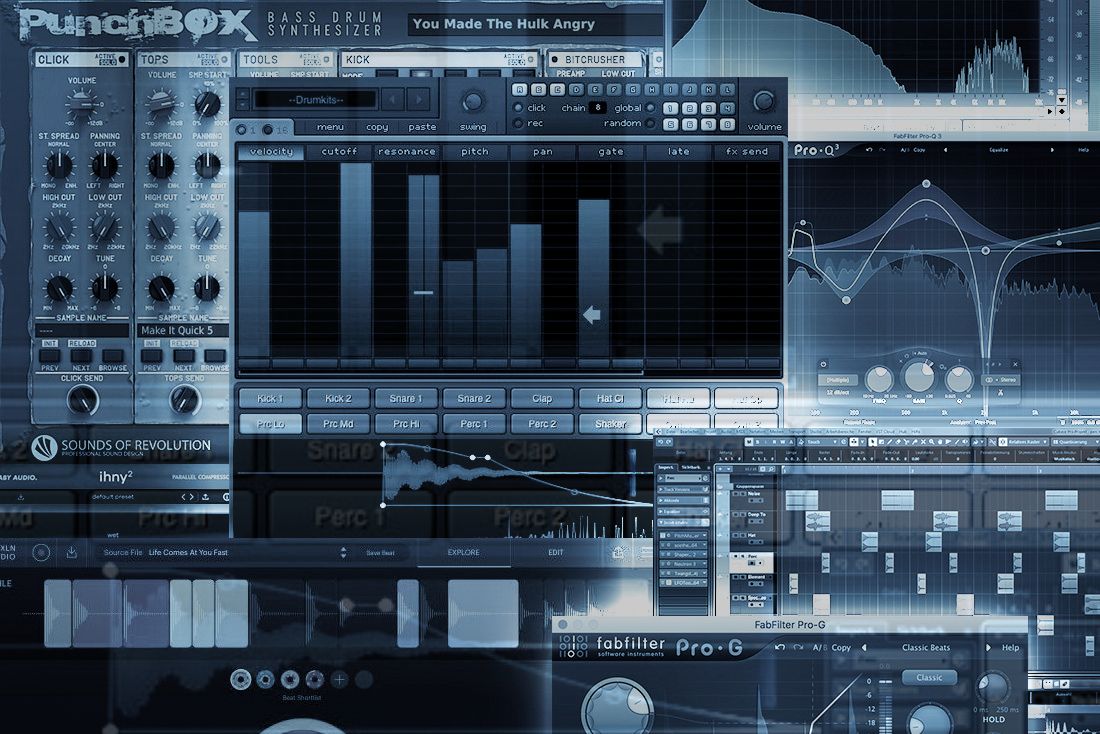
D16 Punchbox – The Kick Specialist
Without a doubt, the legendary TR-909 drum machine is a techno staple. Of course, I am also a big fan of this cult machine. However, since I like to use software solutions with kickdrums due to the flexibility, I can warmly recommend one extremely flexible tool: D16 Group Punchbox
In collaboration with CFA Sound, together with D16 Group, we created the popular VSTi Bassdrum Synthesizer PunchBox. PunchBox is the best of both worlds: expressive synthesized sounds fused with the richness and complexity of real samples bring you top-notch, unheard-of kick sounds that set themselves apart.
This VSTi is specialized in kickdrums like no other tool. In addition to the true-to-original replica of TR-909, TR-808, and TR-606, as well as a Sine Wave, 4 sample-based cells and state-of-the-art effects (EQ, Bitcrusher, Distortion, Filter, and Limiter) are available. Nothing is left to be desired. Lush 1100 samples and 800 presets complete the whole thing.
If you can’t find a suitable kick here, then you are in the wrong business. 😉 A must-have for electronic music producers.

Techno basslines out of a kick drum
Even if this is certainly one of the oldest tricks, I would not like to leave it unmentioned: Creating a techno bassline with the kick drum reverb sound instead of a synthesizer bass sound. The most important thing is the perfect setting of the pe-delay time, density and size of the delay. Just play with the pre-delay time of your reverb. This can also add extra rhythmical elements without the need for adding more samples to your mix.
It is also important that all bass frequencies are of course mono. Compression in connection with side chain to avoid frequency overlaps is elementary here. The whole thing is not that simple and requires some practice. BTW: Ableton’s “Dark Hall Reverb” does a good job on kick drums.


Kickdrum Distortion
Sometimes you want to distort the kick drum to give it a certain note. Also, additional harmonies can sound really interesting. It’s important not to completely distort the kick drum, as this will negatively affect the low end, power and impact. In the end, your kick drum will lose pressure. I recommend D16 Group Devastor 2 or Fabfilter Saturn 2, as you can specifically edit various frequencies here.

Organic sounding shaker/tambourine/drumloops
If you want your shaker/tambourine to sound organic/humanized add a transient designer and automate the attack – sounds like a real musician playing. You can also add a LFO on Decay & Release (4/1 length) to get a human factor.
You can also add some noise from field recordings to get an organic & unique touch. Use field recordings as a basis to create your own style/fingerprint.

Tune your drums / find the key
Since the subject of drum tuning is very important and is underestimated by many, I have created an extra article about it. I’ve put together a few techniques that will improve the quality of your mixes.
Some brief information on this at this point: Tune your drums to the key of your track.
You can easily check the note of drum sample in Fabfilter Pro-Q3, Voxengo SPAN (free Spectrum Analyzer), Melodyne etc.
If your DAW doesn’t contain a (good) tuner, I can recommend the frequency analyzer MTuner from Melda Production. To get this resizable plugin you have to install the “MFreeFXBundle”. During the installation, make sure to install no Payware plugins. This tool is one of the best tuner you will find.
An alternative would be GTune from GVST.
Snare/Clap (Layering / Adding width & depth)
If you can’t find the perfect clap/snare for your track, simply make your own by layering organic (maybe from field recordings) with synthetic sounds. Having two different sounds makes it also easy to spread them in the stereo field. Glue them with a compressor and/or little tape saturation/distortion. Try different pre- and post-delay (Go off the grid!) as this can take your drums to the next level.
In order to achieve a punchy drum sound that asserts itself better in the mix, it is often sufficient to add early reflections of a reverberation. To do this, just set the reverb tail to bypass and only use the early reflections. This is often enough for the sound to assert itself better in the mix.

Xfer Records Nerve VSTi
When I program beats, I really enjoy using Nerve from Xfer Records. It’s a drum machine with sidechain compression, from the minds of Deadmau5 and Steve Duda (creator of Serum).
With this tool, you can edit samples quickly and easily and shape them into something completely new.
It has a powerful internal step sequencer, thousand of samples, 22 simultaneous pre-calculated DSP types that allow you to slice/trim, sculpt, pitch, stretch, and bend and re-synthesize sounds into completely new sounds, great slicing and re-arrange features.
Even subharmonic synthesis, PWM and sine/saw/square/triangle resynthesis are on board. The possibilities that this software drum machine offers are simply mindblowing. With an intuitive interface, easy sidechain compression Nerve is not only just for producers, but for live performances as well.
This versatile tool is a much deeper plug-in than its well organized GUI would suggest. I recommend checking the manual in-depth as there are so many possibilities.
Xfer Nerve is a lot more than an average sample-based drum machine. Thumbs Up!
XLN Audio XO
Who does not know it: You spend countless day/week/years hoarding all kinds of drum samples. Often these samples are saved in various folders on the hard drive. During production, you spend a lot of time rummaging through countless folders again until you find a suitable sample. With XLN Audio XO you can make finding the perfect one-shot sample much easier. XO takes a fresh approach to choose sounds.
While XO includes 8000+ samples (5 GB), you can also import your whole collection as well by scanning your folders once. XO includes also 200+ beat presets (song ready presets incl. kits and loops) and multiple outputs (8 additional buses). Each individual sample is displayed as a point and can be selected in the huge XO Space display. Each sample type has a specific colour (blue for snares, orange for claps, etc.). You can select and play any sample by dragging the mouse pointer or using the keyboard. It’s an incredible way to audition your sounds.
The idea behind XO is that you can seamlessly sweep through your sounds, regardless of where they are stored. With the help of the unique playground (GUI is scalable up to 200%), you can quickly find the sound you want. If the desired samples are found, they can be dragged directly into the DAW or add them to the kit creation. In the background, an extremely sophisticated algorithm works in conjunction with various clever search options. Samples can be exchanged intuitively via hot-swap.
Replacing certain elements and finding a similar-sounding oneshot sample within the unique browser and its intelligent sound selection makes XO incredibly flexible. This feature is a bomb!

There’s also a great sequencer with that combines the sample switching technology. The useful Accentuator helps add dynamics to your rhythms. Export options are manifold, too!
What I like most about XO: To tap into an endless source of happy accidents by swapping or randomizing patterns and sounds – one by one, or all at once. You can really quickly bring different sounds together until they match what you’re looking for. XO is a groundbreaking virtual instrument and has the best sample browser on the market. It’s fun-to-use with a truly unique and intuitive workflow. You simply find your sounds faster!
Boost you drum transients
Basically, correctly applied compression can improve the drum sound. But what is often more useful for me is to emphasize the transients of a drum sound. There are many tools that can take on this task excellently, such SPL Transient Designer, iZotope Neutron, Ableton Live Drum Buss, NI Transient Master, Sonnox Transmod etc.
With these tools you can edit the transients efficiently and thus bring the drum sound forward. It is also interesting to first compress the drum sound and then edit it with the transient designer.
Baby Audio Parallel Aggressor
To get your drum loop fatter and more assertive, just create a duplicate of your signal/track. Then compress the copy heavily – if necessary, add Saturation Tools. After this edit the result with the EQ. In the end, mix the edited copy into the original drum loop according to your taste (= New York Compression). The result is a more powerful drum loop.
With BABY Audio’s unique concept of Parallel Aggressor, this process can be massively simplified. You don’t have to duplicate your signal any more and you save

complex plug-in chains. The fantastic sounding results (transparent and musical) of the plugin are amazingly good. It’s not just parallel compression but also a great sound design tool. The CPU load is low. I can recommend this plugin to everyone!

Baby Audio IHNY-2 (Parallel Compression Plugin)
3 years ago, Baby Audio presented the predecessor. Now Baby Audio claims to have developed “the most powerful compressor in the industry”.
The IHNY 2 is a simple-to-use parallel compressor with a distinctive sound. It has a refreshed GUI and also has been significantly improved in many details. The intuitive XY-Pad allows you to adjust the amount of parallel compression for your mix. Here, you can quickly and easily control the plugin’s most crucial control features. It is adaptable for numerous activities because of the extensive selection of presets and controls provided. It’s what I prefer to use for drum loop programming. Simply put, the sound is more direct.
The Harmonics control is great. Crucial to me is the smiley EQ curve. Often beginners overlook that it is very important to roll off the midrange of a signal when using parallel compression on drums. The tweak parameters, which can be operated intuitively, also enable great results very quickly. The entire plugin looks very tidy, and appealing and simply looks modern.
It provides so much life to a sound without compromising the dynamic that I adore how wild you can
crush a signal and then only delicately blend that in with the dry signal. It improves without detracting from the original sound, which is amazing. With just a few clicks you can go deep into fine-tuning how the sound is shaped and colored. It works great on my drum bus. Recommended!
Drum Bus for glue effect (Saturation/Compression/Reverb)
Once you’ve mixed the individual drum tracks, you’ll need to group them all (except the kick) under one bus and process them as a kit. For example, the internal “Drum Bus” of Ableton works great!
You can also use Saturation to “glue” your drums together in a pleasing way especially when your drum samples come from different sources. Saturation allows you to increase the harmonic complexity of a sample. Don’t go too overboard. Trust your ears. Tools like D16 Devastor2 or Fabfilter Saturn2 or Audio Damage Kombinat do an excellent job here.
Add a little bit of reverb on the drum bus to create the effect as if the drums were recorded in the same room. Through compression, all drums share the same dynamics and movement.
How I make some hats sound more „analog“
One of my pieces of advice is to get a plugin called Toneboosters Ferox that is included in the Track Essentials 3 bundle.
It provides smooth compression and saturation that reminds one of the good old days of tape recording and allows for additional feedback-delay effects, which makes it especially suitable to artistically enhance and enrich individual audio tracks.
Select the preset „smooth highs“. First, you have to level down the HYS to 0-10%. Then play with the Drive, Compress, Release, Feedback, Delay & Saturation Levels. You will notice and hear that your hat gets lots of „grip“ now and overall it sounds much „rounder“ and „warmer”.
Usually, I do this on the hats that lead the vibe & groove. Don’t overdo it. Always A/B things you do and adjust it the right way until you reach the sweet spot.

Hihats (Extra wide / Adding Movement / Mute Groups)
To create really wide hihats producers often duplicate a sample and pan the original hard left and the copy hard right. After that one side will be delayed a few milliseconds. The human brain perceives both sounds as a single sound (= Haas effect). A better way: When you use similar sounds (but not the same ones) you can create the same effect without the need to delay one side. This method is more mono-compatible as the first one If it sounds too wide/unnatural simply decrease the pan amount.
Phasers and flangers can bring interesting movements into linear hi-hat patterns by sweeping through the frequency range. For subtle changes, keep the Mix Value low. Sweep the LFO over an 8 or 16 bar cycle. Automate the wet mix level slowly when the track needs more tension/intensity (ideally before a break)
To create more tightness and realistic sounding hi-hats use mute groups. If you want to stop an open hihat by a closed one then this is an easy way.

Use Gates
You have certainly come across the scenario of putting too much reverb on the drums. As a result, the drums become cloudy and lose the ability to cut through the mix any more.
Then it’s time to put a gate after a reverb in your effects chain. The ‘Attack’ and ‘Release’ controls determine how much reverb tail remains in the mix before the gate is closed. A gate works also great on the Drum Buss, Bass, Vocals etc.
I use gates to bring clarity to my drum loops & mix. Fabfilter Pro-G is my favourite one!
Accusonus Regroover Pro (DISCONTINUED!)
When I tested this tool for the first time, I couldn’t believe it. I was beyond fascinated & inspired by this plugin. Regroover Pro is a unique beat slicing tool that extracts stems from your audio loops and enables new beat-making workflows.
You can do so many different things with it: cleaning drum loops, layering & replacing drums, re-order kicks, hats, snares etc. It’s an experimental groove design with lots of fun to become addictive. It offers a totally new way to manipulate (drum)loops with a quick and easy workflow.

I hope you find these tips about Drumloop / Beat Programming useful!


